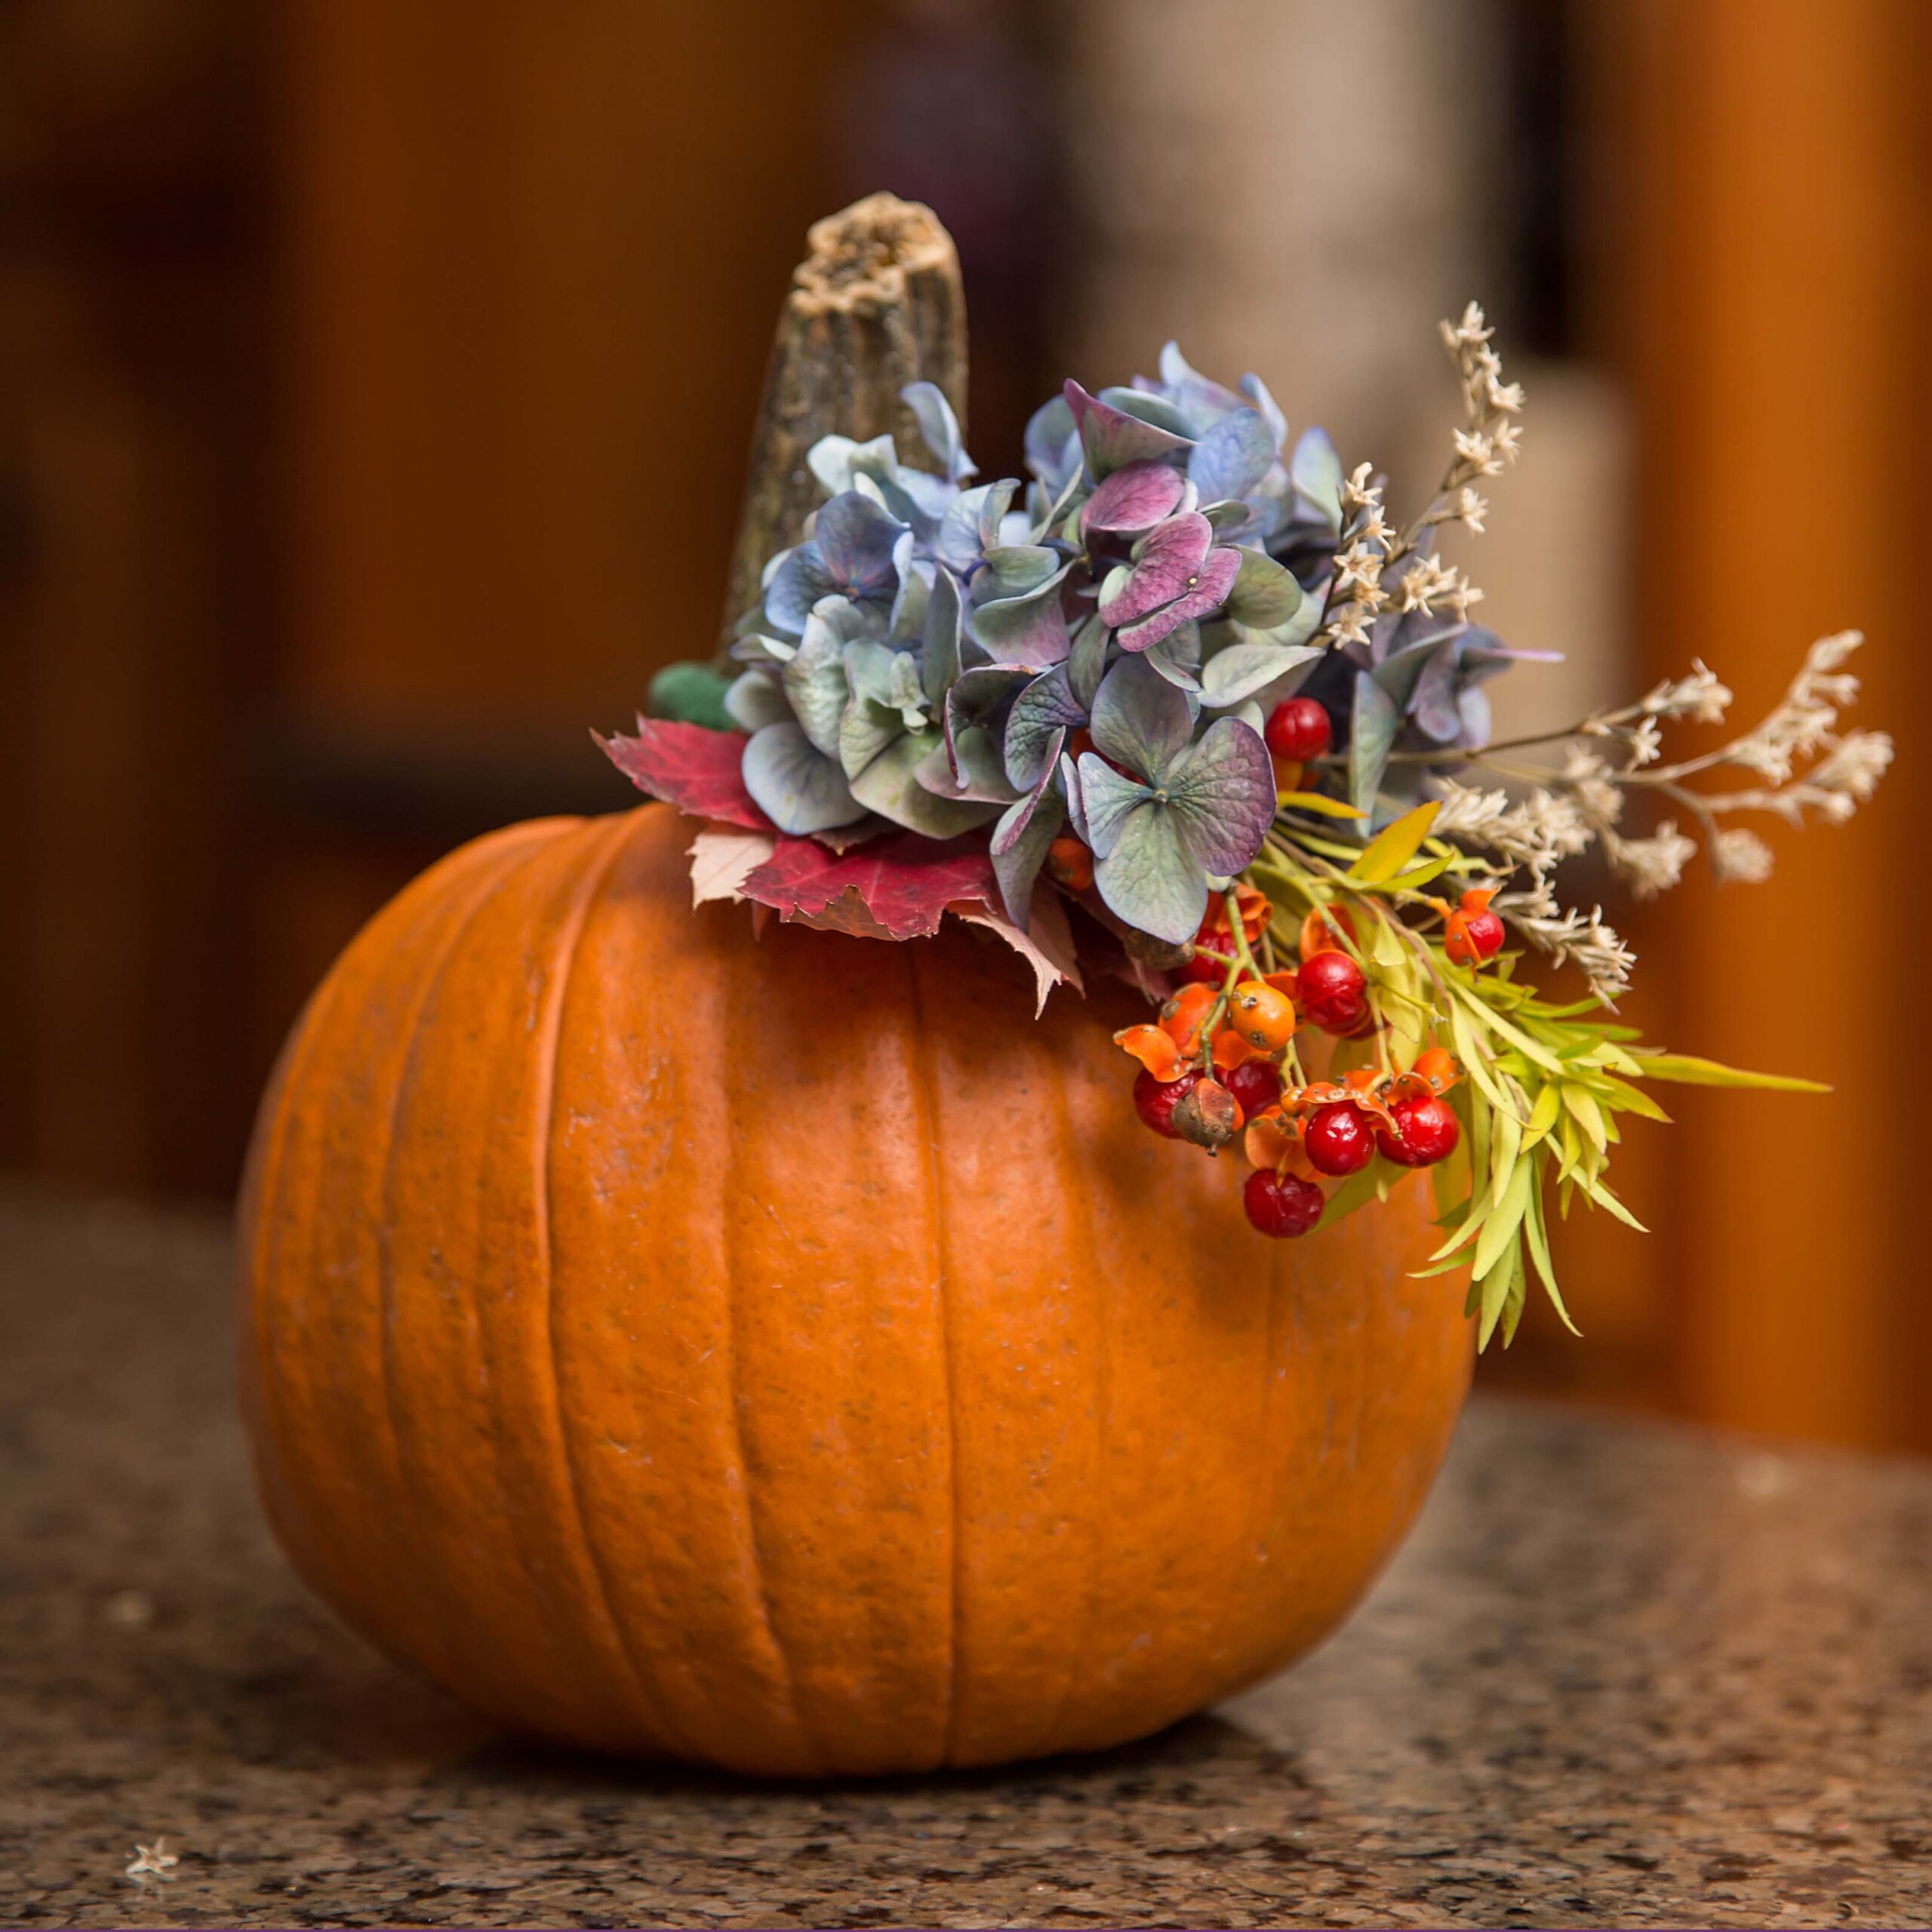
Whether you’re hoping for a way to bring your garden inside in fall or searching for a fun and easy DIY project, these little pumpkin hydrangea arrangements are quick, easy, and adorable. Follow along below for step-by-step instructions on how you can make them at home!
For this arrangement, you’ll want to cut your stems relatively short. Additionally, make sure the stems are clear of any leaves. At this time, you’ll also cut a few strips of wire. Make sure they’re cut long enough to wrap into the bloom while also wrapping around the pumpkin’s stem. For each cut flower, slip a piece of wire through a fork or branching on the stem. No need to stick the wire through the stem, just make a loop to hook gently around the plant while keeping the other end of the wire straight.
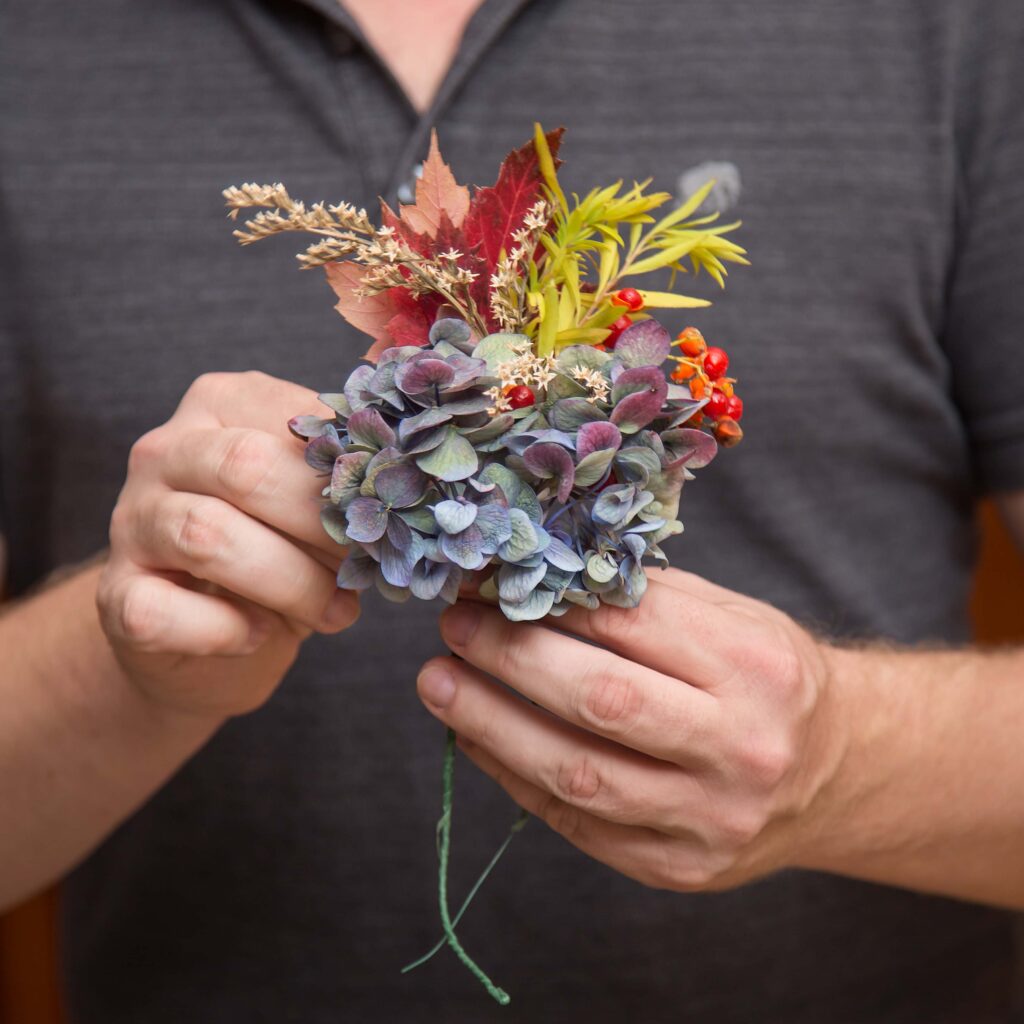
In your hand, start arranging your hydrangeas and foliage. Get creative and have fun with it!
Once you’re happy with how your arrangement looks, wrap the stems and wire with floral tape. Start at the top, where you looped the wire around the plants. Then, like you would a bandage, wrap the stems and wire together. In the end, you’ll have one “stem” to work with, made up of wire and floral tape.
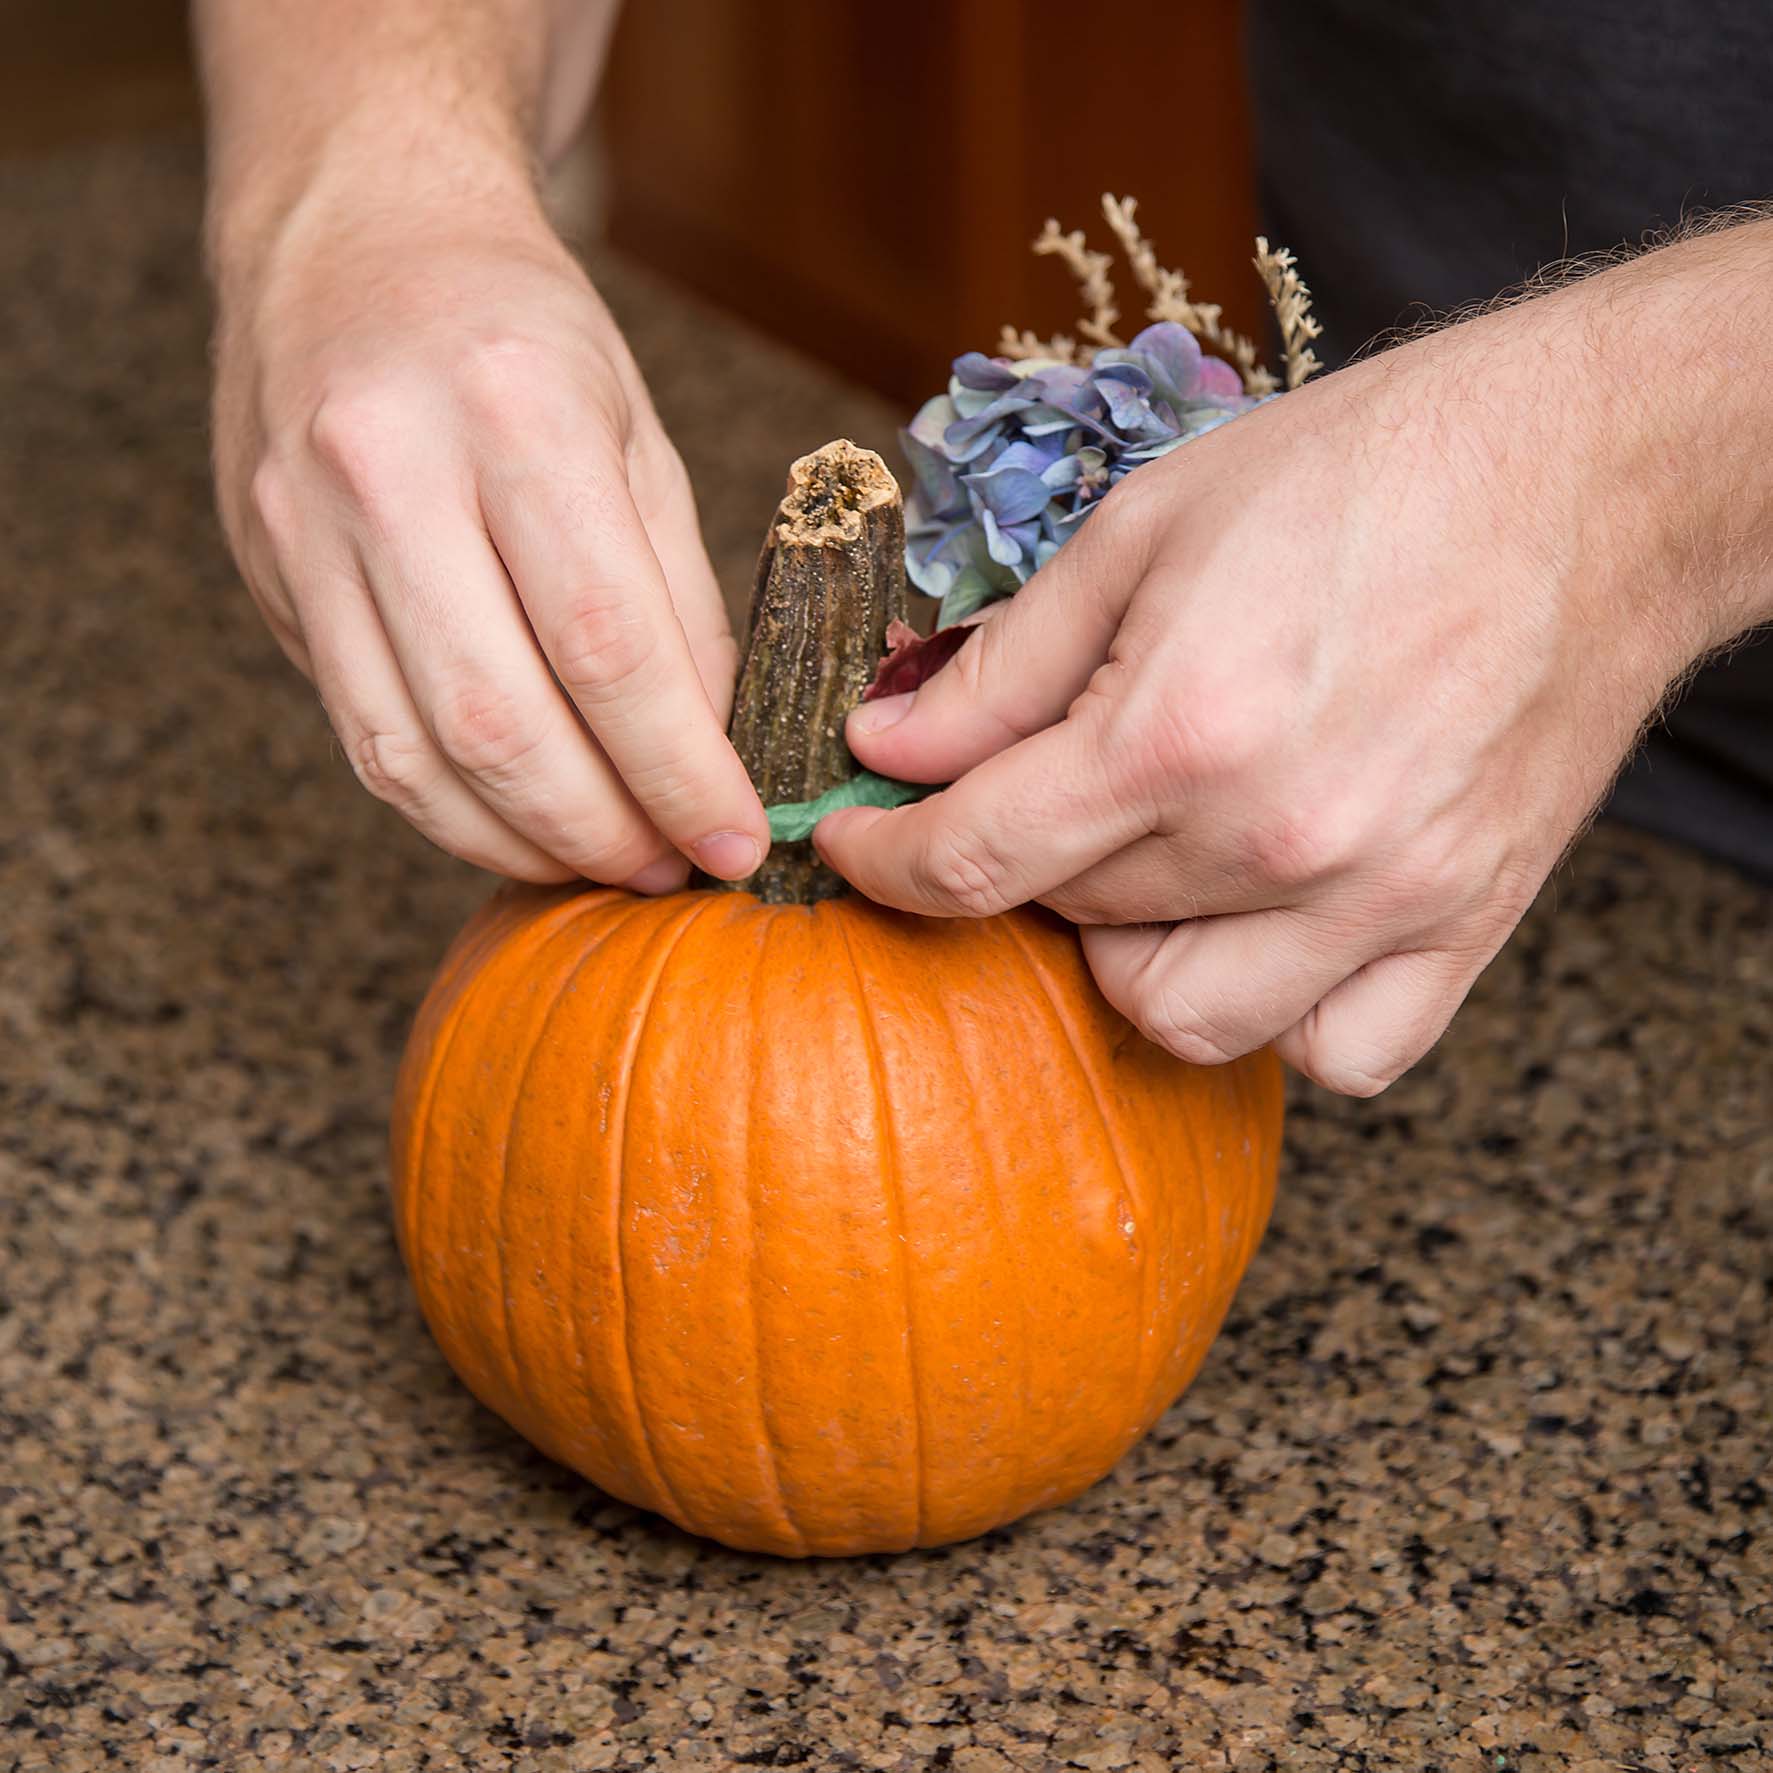
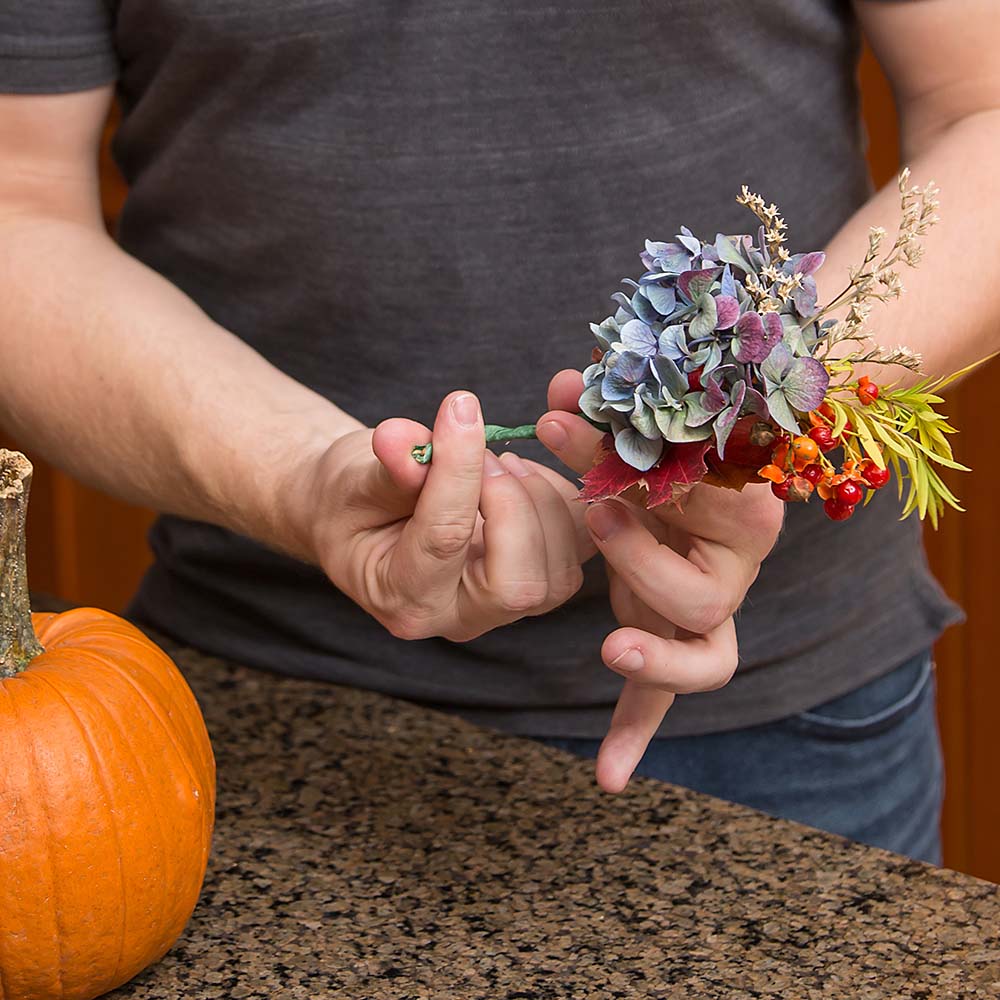
Put a little loop at the end of the wire. Make sure it’s big enough to fit around the stem of the pumpkin snuggly. Then, place that end around the pumpkin stem and loop the rest of the wire around. If the wire is too long, use your wire cutters to cut it to the perfect length.
And there you have it. So, whether you make these pumpkin hydrangea arrangements as fall decor, or to help get you in the Halloween or Thanksgiving sprit, you can enjoy them all season long! As always, we love to see what you come up with, so remember to share your arrangements with us on social by tagging @endlesssummerhydrangeas.